
Your Payeer Account: How to Set Up and Verify in 5 Easy Steps
Learn how to set up and verify your Payeer account in just 5 easy steps! Our guide covers everything you need to know about using it for online transactions
Are you looking for a reliable and efficient payment system to process your online transactions? Then, Payeer is your best choice. With over 9 million users worldwide, Payeer is a popular e-wallet that allows you to send and receive money, shop online and even exchange cryptocurrencies; but before you can get started with that platform to use many of these features, you must set up and verify your account. Don’t worry; It’s quick and easy! In this blog post, we will show you the five simple steps needed to create and verify your account with Payeer. So let’s get started!
Step 1: Create a Payeer Account
The key step to start using Payeer is by creating an account, so in order to begin using this payment processor you need to go to their website and select “Create Account” as your starting point.

Input your chosen password along with the required email and the “Create Account” button should be clicked after finishing.
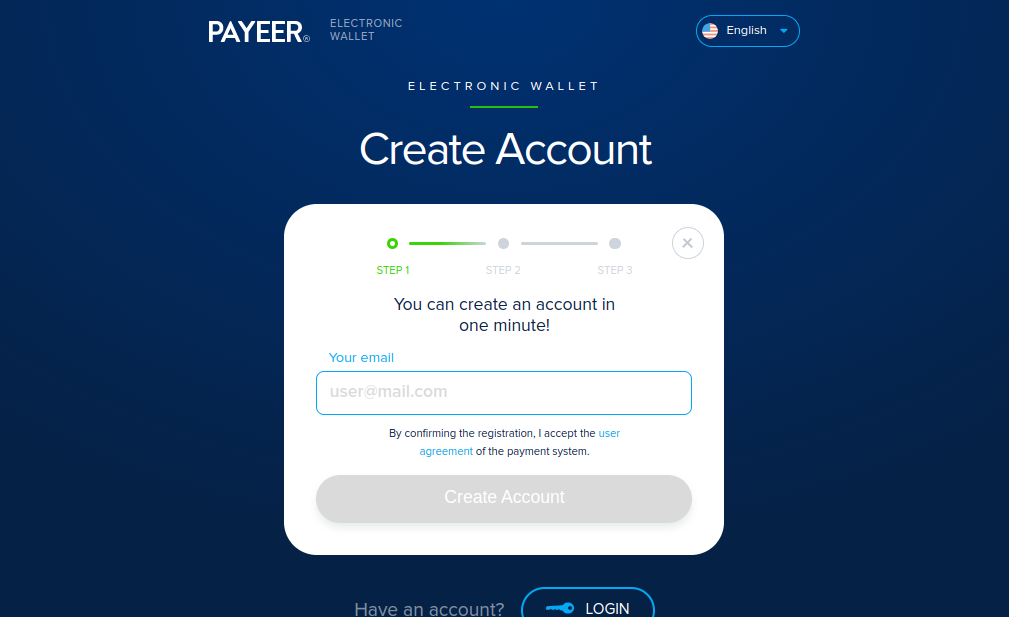
A confirmation link from Payeer via-email will verify your newly created account, so your account can be activated by clicking on the provided link. Upon activating your account you will be able to proceed to the following step.
Step 2: Deposit Funds
If you want to use Payeer system, you need to deposit funds initially and navigate to and select “Deposit” from within the main menu. Several payment alternatives will be presented and you can choose one.
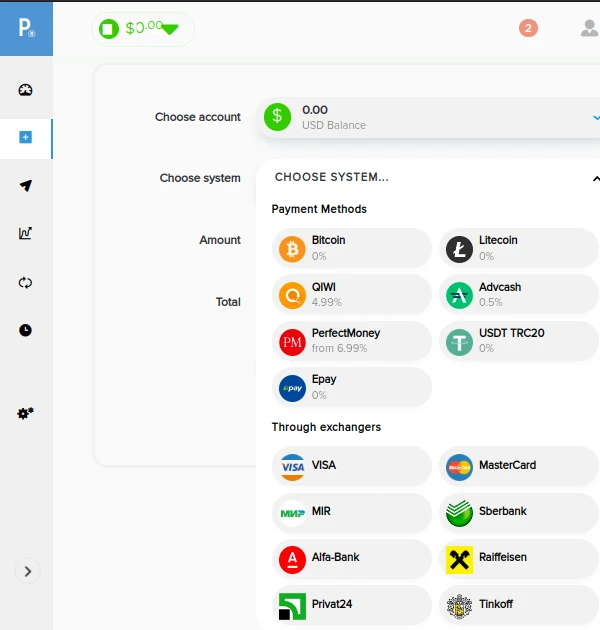
Opt for the payment method of your choice and simply follow the given instructions to complete the process. The following stage can be pursued once your money has been deposited.
Step 3: Set Up 2-Factor Authentication
For additional security, it is recommended that you set up 2-factor authentication on your Payeer account. To do this, go to the “Security” tab in the main menu and click on “2-Factor Authentication”. Follow the instructions for setting up 2-factor authentication using your phone or authentication application.
Step 4: Verify Your Account
Before you can start using all the features we mentioned, you must verify your Payeer account. To do this, go to the “Verification” tab of the main menu and follow the instructions to complete the verification process.
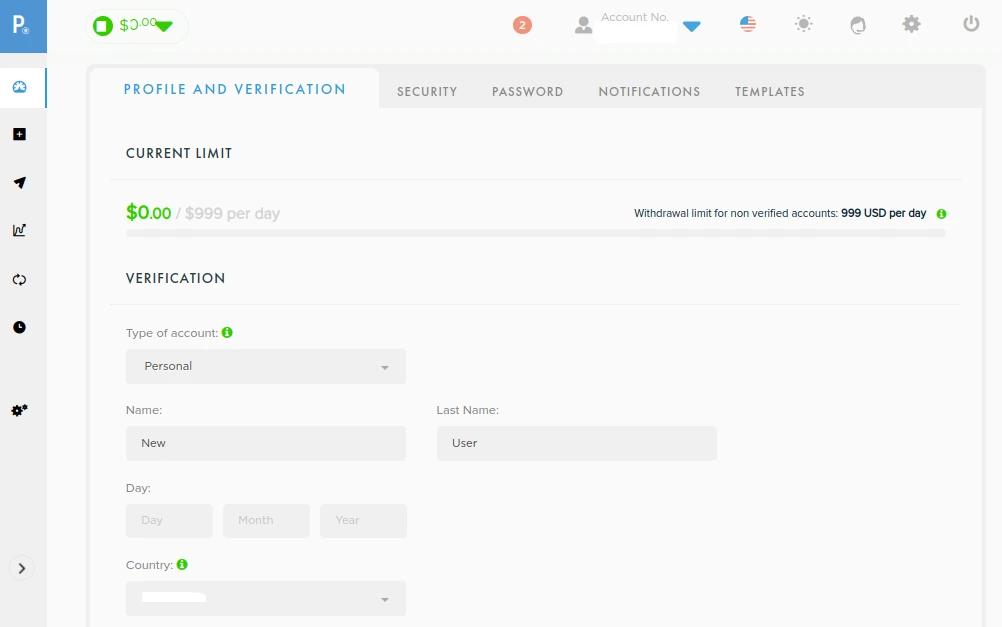
You will be asked to provide your personal information and upload a photo of your government issued ID.
Once your account is verified, you can start using all of Payeer’s features, including sending and receiving money, exchanging currencies, and more.
Step 5: Start Using Payeer
Having successfully registered and verified with Payeer, you can now start making use of the service for all of your online transactional needs.
Payeer’s service makes it simple whether you’re a freelancer searching for payment in exchange of services rendered, or an internet business owner wishing to accept money from clients; both can now get their payment easily and safely through this platform.
Payeer offers a user-friendly interface at a low cost making it the perfect choice for anyone looking for reliable online payments
The Bottom Line
Getting started with Payeer is straightforward – create your account easily and by implementing these 5 straightforward steps you will be able to start using this solution for all your online transaction needs.
With its easy-to-use interface coupled with swift transactional processing times at competitive prices makes Payeer ideal for anyone looking for a secure payment option
So, what are you waiting for? Sign up now to take advantage of all of the attractive benefits that come with using Payeer!